
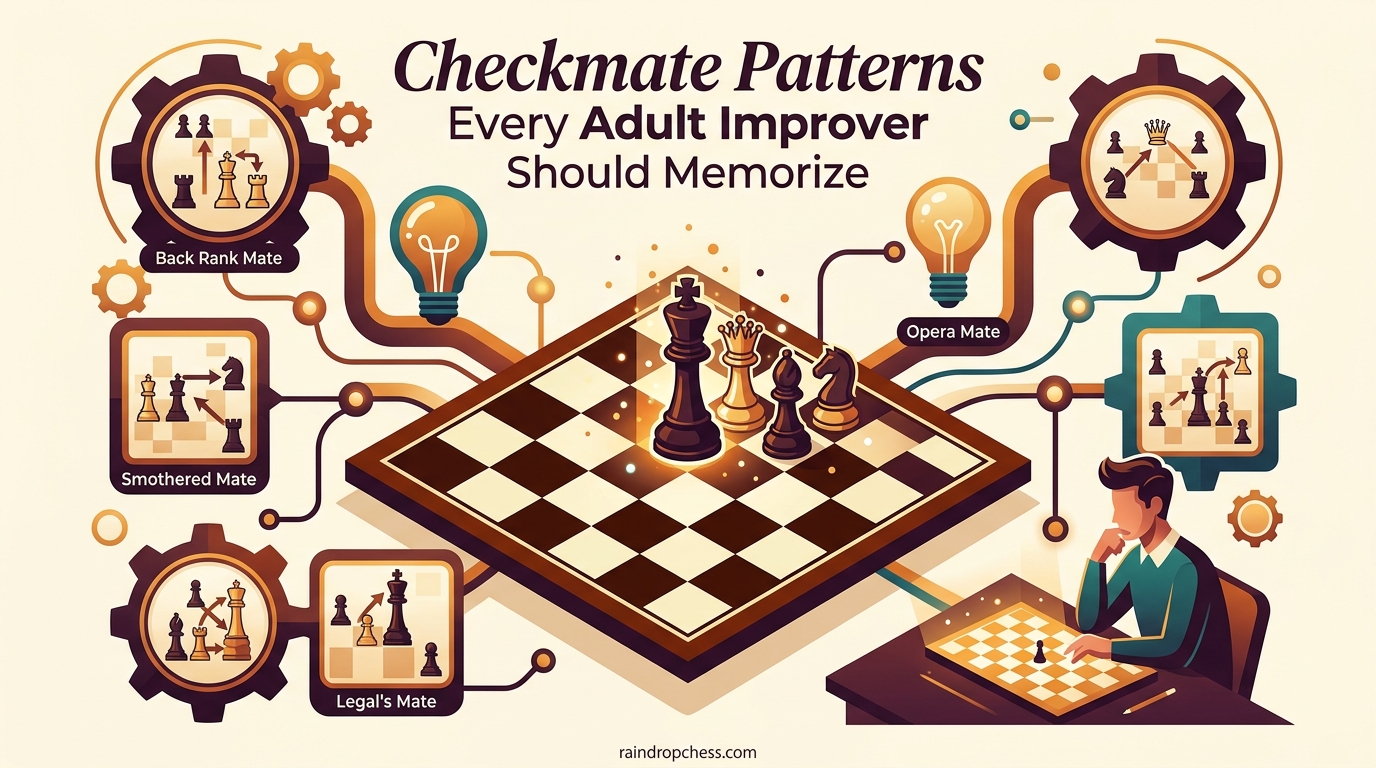
I have played chess for years, and one thing I see over and over is adult improvers winning material, building a dominant position, and then completely missing the finishing blow. It is frustrating. You played 35 good moves and then the checkmate was right there, staring you in the face, and you played something else. If that sounds familiar, you are not alone. The missing ingredient is checkmate pattern recognition.
A checkmate pattern is a recognizable arrangement of pieces that leads to checkmate. Think of it as a template your brain learns to spot automatically. Once you internalize these patterns, you stop calculating every possible variation and start seeing the mate before it happens. That is the difference between a player who fumbles in the endgame and one who converts efficiently.
This guide covers the 10 checkmate patterns every adult improver should memorize. I chose these 10 because they appear constantly in real games at the club and intermediate level. I ordered them roughly by how often you will actually encounter them, starting with the most frequent. Each pattern includes a clear visual description, how to recognize the setup, and practical tips for players who started chess as adults.
Adult learners face a specific challenge that children do not: our brains are less plastic, so we need structured repetition and memory techniques to make patterns stick. I will share those techniques after we cover all 10 patterns. Let us get started.
One more thing before we begin. You do not need to memorize 36 or 37 checkmate patterns like some guides suggest. That approach is overwhelming and counterproductive. The 10 patterns in this guide cover the vast majority of checkmates you will encounter in games rated between 800 and 1800. Master these 10 first. You can always add more later, but these are the patterns that will actually win you games right now.
Table of Contents
Quick Reference: The 10 Checkmate Patterns Every Adult Improver Should Memorize
Here is the complete list at a glance. Each of these checkmate patterns shows up repeatedly in games rated between 800 and 1800. I have ordered them from most to least common in practical play:
- Back Rank Mate — The king is trapped behind its own pawn shield on the back rank, and a rook or queen slides in for the kill.
- Smothered Mate — A knight delivers checkmate while the enemy king is completely surrounded by its own pieces.
- Anastasia’s Mate — A rook and knight cooperate to trap the king against the edge of the board, with the knight controlling escape squares.
- Arabian Mate — A rook and knight corner the enemy king, with the knight cutting off escape and the rook delivering the final blow.
- Epaulette Mate — The king is boxed in by its own rooks on either side (like shoulder epaulettes), and a queen checks along the rank.
- Scholar’s Mate — A four-move checkmate where queen and bishop target the f7 (or f2) square early in the game.
- Fool’s Mate — The fastest possible checkmate in chess, occurring in just two moves when the player weakens the kingside.
- Boden’s Mate — Two bishops criss-cross diagonals to deliver checkmate, creating a distinctive X-pattern on the board.
- Anderssen’s Mate — A bishop opens a file for a rook to deliver checkmate, typically after a pawn sacrifice on g7 or g2.
- Morphy’s Mate — A rook delivers checkmate with support from a bishop along a diagonal, often after the king is forced to a corner.
Bookmark this list. When you can recognize all 10 from memory, you will start converting games that you currently draw or lose. I recommend printing this page or saving it somewhere accessible so you can review it during your study sessions.
1. Back Rank Mate — The Most Common Checkmate Pattern You Will See
The back rank mate is the single most common checkmate pattern in club-level chess. I see it in roughly one out of every four games I review for students. It happens when the opponent’s king is on the back rank (row 1 for White, row 8 for Black), hemmed in by its own pawns, and a rook or queen slides to that rank to deliver checkmate.
Here is the classic setup: White has castled kingside. The pawns on f2, g2, and h2 have not moved. The king sits on g1 or h1. If White’s back rank is undefended and Black gets a rook to e1, d1, or c1, it is over. The king cannot escape because its own pawns block every exit. The rook delivers check, the king has zero flight squares, and the game ends.
The reason this checkmate pattern is so important for adult improvers is that it works both ways. You will win many games by spotting an undefended back rank, and you will lose just as many if you neglect your own. I recommend checking your back rank before every single move. Make it a habit. Ask yourself: “Is my back rank secure right now?” If the answer is no, fix it before doing anything else.
How to recognize it: Look for a castled king with unmoved pawns in front. Then check whether the back rank is defended by a rook or queen. If it is not, the back rank mate is lurking. This is a pattern that rewards vigilance more than calculation. Once you see the setup, the move is usually obvious.
One practical tip: the “luft” (German for “air”) move. Pushing the h-pawn one square forward creates an escape square for your king and eliminates the back rank vulnerability. Get in the habit of playing …h6 or h3 once your king is castled, especially if the position is semi-open.
The back rank mate also appears in slightly more complex forms. Sometimes the rook does not deliver check directly on the back rank but instead the queen does, with the rook supporting from behind. Other times, a sacrifice on the back rank clears the way for the mating piece. The core concept remains the same: the king is trapped behind its own pawns and a heavy piece reaches the back rank.
2. Smothered Mate — When the King’s Own Army Becomes Its Prison
The smothered mate is one of the most visually satisfying checkmate patterns in chess. It occurs when a knight delivers checkmate and the enemy king has literally zero escape squares because it is completely surrounded by its own pieces. The king is smothered by its own army.
The classic version happens like this: the black king is on g8, hemmed in by pawns on f7, g7, and h7, and pieces on f8 and h8. A white knight lands on f7 or e6, and even though the knight only attacks a few squares, those happen to be the only squares the king could move to. Check and checkmate.
But the real magic of the smothered mate is the lead-in sequence. The most famous version involves a queen sacrifice to force the king into a corner, followed by the knight jumping in for the kill. Philidor’s legendary version goes: Queen checks on g8, the rook on f8 has to capture, but then the knight slides to e7 or f7 for checkmate. The queen is sacrificed to create the smothering position, and the knight finishes the job.
For adult learners, this pattern is valuable because it trains you to look for knight maneuvers near the enemy king. Knights are tricky pieces, and most intermediate players underestimate their mating potential. When you see a knight operating near the enemy king with lots of friendly pieces crowded around, start looking for smothered mate possibilities.
How to recognize it: The key signal is an enemy king surrounded by its own pieces, with a knight nearby. If the king has two or three pieces and pawns blocking every direction, and you have a knight within two moves of the action, calculate the smothered mate. The pattern is rare enough to feel special but common enough that knowing it will win you games.
The smothered mate also teaches an important attacking principle: sometimes the opponent’s pieces are actually helping you. A cramped position where the enemy pieces block their own king’s escape is a precondition for many checkmate patterns, not just the smothered mate. Train yourself to see enemy pieces not just as obstacles but as potential walls trapping their own king.
3. Anastasia’s Mate — The Rook and Knight Tag Team
Anastasia’s mate is a powerful checkmate pattern that combines a rook and a knight working together along the edge of the board. The name comes from a novel published in 1903, though the pattern itself is much older. In this checkmate, the rook delivers the final blow while the knight controls the king’s escape squares.
The typical setup: the black king is on the h-file, often after being pushed there by a pawn advance or piece pressure. A white rook slides to h8 (or wherever the king is pinned against the edge), delivering check. Meanwhile, a white knight sits on e7 or f6, controlling the g8 and g6 squares. The king cannot escape because the knight covers the only available squares and the edge of the board blocks the rest.
This pattern is especially common in games where one side has launched a kingside attack with pawns and pieces. After the pawn storm pushes the enemy king to the side, Anastasia’s mate appears as the final combination. The critical piece is the knight on e7 — if you see that piece placed, the mating idea is often just one or two moves away.
For adult improvers, I recommend studying Anastasia’s mate because it teaches an important concept: pieces working together to control escape squares. The rook does not need to cover every square itself. The knight handles the flight squares, and the rook delivers the check. Understanding this division of labor improves your overall attacking play.
How to recognize it: Look for a king trapped against a file (usually the h-file), a rook that can reach that file, and a knight positioned to control the king’s potential escape routes. If all three elements are present, Anastasia’s mate is on the table.
Another version of Anastasia’s mate occurs when the king is trapped on the e-file instead of the h-file. The principle is identical: the rook delivers check along the file, and the knight covers the escape squares. The file does not matter as long as the king is trapped against the edge with no room to maneuver.
4. Arabian Mate — Cornering the King with Rook and Knight
The Arabian mate is one of the oldest named checkmate patterns, dating back to medieval chess manuscripts from the Islamic world. It involves a rook and knight trapping the enemy king in the corner of the board. The rook delivers the check while the knight cuts off the remaining escape squares.
The standard position: the black king is on h8 (or a1, depending on which corner). A white rook sits on g8, delivering check along the back rank. A white knight on f7 (or the equivalent square) controls the g5 and h6 squares. The king is stuck in the corner with nowhere to go. Check and mate.
This pattern comes up frequently in endgames, especially rook endgames where one side has an extra knight. Many players focus on pawn promotion in endgames and miss that the Arabian mate is available right now. I have reviewed dozens of games where a player pushed a pawn toward the eighth rank when they could have delivered Arabian mate in two moves.
The reason the Arabian mate appears so often in endgames is that the board is less crowded. With fewer pieces blocking lines, the rook and knight have room to coordinate. The king, often chased to the edge by the rook, becomes vulnerable to this corner pattern.
For adult learners, the Arabian mate is one of the easier patterns to memorize because it has such a distinctive shape. The knight sits on the square next to the corner, the rook slides to the edge, and the king has absolutely no escape. Once you visualize it once, you will recognize it again instantly.
How to recognize it: Look for a king near a corner, a rook that can control the edge file or rank, and a knight within jumping distance of the squares around the king. If the king is already in the corner, the Arabian mate is often just one move away.
5. Epaulette Mate — When Your Own Rooks Become Shoulder Pads
The epaulette mate gets its name from a visual resemblance: the enemy king is trapped on the back rank with its own rooks on either side, looking like the epaulettes (shoulder decorations) on a military uniform. A queen slides to the same rank and delivers checkmate because the king cannot escape sideways (blocked by rooks) or forward (blocked by pawns).
The classic position: Black king on e8, Black rooks on d8 and f8, and Black pawns on f7 and g7 (or similar). White plays Qe8-check, and the king is boxed in. The rooks prevent the king from moving to d8 or f8, and the pawns block forward movement. The queen delivers check and there is no piece that can capture it.
This pattern occurs more often than you might think, especially in games where one side has placed rooks passively on the back rank. Many club players develop a habit of putting rooks on d1 and f1 (or d8 and f8) for defense, but this setup actually creates the exact configuration needed for the epaulette mate.
The lesson for adult improvers is both offensive and defensive. Offensively, when you see enemy rooks sitting on either side of the enemy king on the back rank, look for a queen infiltration to the same rank. Defensively, avoid this passive rook placement if the center is open and the enemy queen is active.
How to recognize it: The telltale signal is a king on the back rank with friendly pieces (usually rooks) on both adjacent squares. If you see this structure and you have a queen, calculate whether you can reach the back rank. If you see this structure and you are defending, move one of the rooks to give your king breathing room.
A variation of the epaulette mate occurs when the king is trapped on the second or seventh rank instead of the back rank. The principle is the same: pieces block the king on both sides, and a heavy piece delivers check from the front. The rank number does not matter as long as the trapping conditions are met.
6. Scholar’s Mate — The Four-Move Trap Every Improver Should Understand
Scholar’s mate is one of the first checkmate patterns most players encounter, usually on the losing side. It happens when White plays 1.e4, develops the bishop to c4, brings the queen to h5, and then captures on f7 with the queen, delivering checkmate. The whole sequence takes just four moves: 1.e4 e5 2.Bc4 Nc6 3.Qh5 Nf6?? 4.Qxf7#.
You might think this is too basic for an adult improver’s guide. But understanding Scholar’s mate is important for three reasons. First, you need to know how to defend against it if someone tries it on you. Second, the underlying pattern — queen and bishop cooperating to attack f7 (or f2) — appears in many more sophisticated checkmate patterns. Third, it teaches the fundamental concept of piece coordination in attacks.
The key square in Scholar’s mate is f7 for Black (f2 for White). This pawn is only defended by the king at the start, making it the weakest point in the initial position. When the queen and bishop both target this square, the mate is forced. This concept of two pieces targeting the same weak point carries through to advanced chess as well.
Defending against Scholar’s mate is straightforward. The simplest method is 1…e5 2…Nc6 3…Qe7, which blocks the queen’s path to f7. Alternatively, 3…g6 drives the queen away entirely. The important thing is to recognize the threat early and not play mechanically.
For adult learners, I recommend practicing both sides of Scholar’s mate. Try to execute it a few times against a computer set to a low level, and then practice defending against it. The pattern recognition you build will transfer to more complex positions where queen and bishop team up against f7 or f2.
The deeper lesson from Scholar’s mate is about weak squares around the uncastled king. The f7 and f2 pawns are only protected by the king until other pieces develop. This vulnerability exists in many openings and is not limited to the Scholar’s mate sequence. Understanding why f7 is weak helps you spot dozens of related attacking opportunities in your games.
7. Fool’s Mate — The Fastest Checkmate in Chess
Fool’s mate is the quickest possible checkmate in chess, occurring in just two moves: 1.f3 e5 2.g4 Qh4#. The white king is checkmated on e1 because the queen attacks from h4 along the e1-h4 diagonal, the f-pawn has moved to f3 (opening the diagonal), and the g-pawn has moved to g4 (removing any blockade). The king has no escape.
You will probably never play this exact sequence in a rated game. But Fool’s mate teaches one of the most important lessons in chess: do not weaken the area around your king. Both f3 and g4 are terrible moves precisely because they create holes around the king that the opponent can exploit. Every time you push a pawn near your king, you are creating potential weaknesses.
The pattern behind Fool’s mate — a queen infiltrating along a diagonal opened by pawn moves — appears in many practical games. The opponent pushes the f-pawn and g-pawn (or c-pawn and b-pawn on the queenside), and suddenly a diagonal leads straight to the king. The principle is the same even if the specific moves are different.
For adult improvers, Fool’s mate is a cautionary tale. Many intermediate players push pawns aggressively without considering how those pawn moves change the landscape around their king. Before every pawn push near your king, ask yourself: “What diagonals and files does this open?” If the answer includes a line toward your king, reconsider the move.
How to recognize the underlying pattern: Look for pawn moves that open diagonals toward the enemy king. When you see your opponent pushing f-pawns or g-pawns early, start looking for diagonal queen attacks. The Fool’s mate pattern is the simplest version of this idea, but the concept scales all the way to grandmaster-level games.
Fool’s mate also demonstrates a broader chess principle: early pawn moves in front of your king are risky. This does not mean you should never move those pawns. It means every pawn move near your king should be deliberate and justified, not automatic. Ask yourself what the pawn move accomplishes and what it weakens before you play it.
8. Boden’s Mate — Two Bishops on Criss-Crossing Diagonals
Boden’s mate is one of the most visually distinctive checkmate patterns in chess. Two bishops sit on criss-crossing diagonals and combine to deliver checkmate, with the enemy king caught at the intersection point. The pattern looks like a giant X on the board.
The classic position: White has bishops on a6 and f4 (or similar diagonals). The black king sits on c8, hemmed in by its own pieces and pawns. The bishop on a6 controls d8, b7, and the light squares around the king. The bishop on f4 controls e5, d6, and the dark squares around the king. Together, the bishops cover every escape square and deliver checkmate.
This pattern occurs most often after the opponent has castled queenside or when the central files are blocked with pieces. The key setup is a king that has limited mobility, combined with two bishops that can reach criss-crossing diagonals aiming at the king’s position.
Boden’s mate also appears in the damage wrought by a bishop sacrifice. Sometimes you sacrifice a bishop to open a diagonal, and your remaining bishop slides into a mating position on the newly opened line. The sacrifice creates the conditions for the criss-cross.
For adult learners, Boden’s mate is a great pattern to study because it trains you to think about bishops working as a pair. Many players use their bishops independently, but the bishop pair is one of the most powerful assets in chess. When you learn to coordinate them, you will start spotting Boden’s mate and similar patterns in your games.
How to recognize it: The setup signal is two bishops (or the potential for two bishops) aimed at the enemy king from different diagonal directions. If the king is near the corner or edge and you have the bishop pair, always check whether the diagonals intersect at the king’s location.
Boden’s mate is named after Samuel Boden, an English chess player from the 19th century. While the name is historically interesting, what matters for your game is the visual pattern: two diagonals crossing through the king’s position. Whenever you have the bishop pair and the enemy king has restricted movement, scan for this criss-cross configuration.
9. Anderssen’s Mate — Bishop Opens the Door for the Rook
Anderssen’s mate is named after Adolf Anderssen, one of the strongest players of the 19th century, who used this pattern to finish several famous games. The pattern features a bishop and rook cooperating, where the bishop controls a key diagonal and the rook delivers checkmate on an open file.
The typical setup: the black king is on g8 with pawns on f7, g6, and h7. A white bishop sits on d3 (or another long diagonal aiming at the kingside). The bishop controls the g6 and h7 squares. A white rook then slides to g1 or g8, delivering checkmate. The bishop prevents the king from escaping to g6, and the pawns block the other squares.
What makes Anderssen’s mate special is the setup move. Often, the bishop sacrifice on g7 (or g2) is the key. White plays Bxg7, eliminating a defensive pawn and opening the g-file. Now the rook has a clear path to g8 for checkmate. The sacrifice is the trigger that creates the mating conditions.
This pattern frequently appears in games where one side has built up a massive kingside attack but needs that one final push. The bishop sacrifice opens the door, and the rook walks through. It is aggressive, direct, and extremely effective.
For adult improvers, Anderssen’s mate teaches the concept of sacrificial mating combinations. Many intermediate players are too materialistic and will not sacrifice a bishop unless they see a guaranteed return. Anderssen’s mate is a pattern where the sacrifice is the checkmate. You give up the bishop to open the file, and the rook finishes the game. Once you internalize this idea, you will start looking for similar sacrifices in your own games.
How to recognize it: Look for a rook aimed at an open or semi-open file near the enemy king, a bishop on a long diagonal targeting squares around the king, and a pawn that could be sacrificed to open the file completely. If those three elements are present, calculate Anderssen’s mate.
The bishop sacrifice that triggers Anderssen’s mate is one of the most important tactical motifs in chess. Even when the full checkmate is not available, the same sacrifice often wins material or creates a decisive attack. Learn to see the Bxg7 (or Bxg2) sacrifice whenever you have a rook on the g-file and a bishop aiming at the kingside.
10. Morphy’s Mate — Aggressive Play Rewarded
Morphy’s mate is named after Paul Morphy, the American chess prodigy who dominated the chess world in the 1850s. The pattern features a rook delivering checkmate with support from a bishop along a diagonal, typically after the enemy king has been forced into a corner.
The standard position: the black king is on h8, trapped in the corner. A white bishop controls a diagonal through the king’s position (say, from b2 to h8). A white rook delivers check along the back rank from a8 or g8. The bishop prevents the king from escaping along the diagonal, and the edge of the board blocks everything else. The result is checkmate.
Morphy’s mate often arises from aggressive play. In many of Morphy’s famous games, he sacrificed material to drag the enemy king into the open, then used the rook and bishop to deliver the final blow. The pattern rewards players who play actively and look for forcing moves rather than cautious positioning.
This pattern is closely related to Anderssen’s mate, and the two sometimes blend together. The main difference is which piece delivers the check. In Anderssen’s mate, the rook delivers check on an open file with the bishop supporting. In Morphy’s mate, the bishop controls the critical diagonal and the rook delivers check. In practice, both patterns involve the same pieces and similar setups.
For adult learners, Morphy’s mate is the final piece of the puzzle. It teaches you to think about rook-bishop cooperation and to look for checkmate patterns when the enemy king is in the corner. Combined with the other nine patterns in this guide, you now have a complete toolkit for finishing games decisively.
How to recognize it: Look for a king pushed to the corner, a bishop aimed at the corner along a diagonal, and a rook that can reach the edge rank or file. When these three elements align, Morphy’s mate is often available.
Studying Paul Morphy’s games is one of the best ways to understand this pattern in context. His famous “Opera Game” against Count Isouard features several of the patterns in this guide working together. Watching how Morphy built pressure piece by piece until the checkmate became inevitable is a masterclass in attacking chess.
How to Practice These Checkmate Patterns Effectively
Knowing the 10 checkmate patterns intellectually is not the same as recognizing them in your games. I talk to adult improvers all the time who say, “I know what a back rank mate is, but I never see it when I play.” That gap between knowledge and application is exactly what deliberate practice closes.
The most effective method I have found is pattern-specific puzzle training. Instead of solving random puzzles, work through sets of puzzles that feature one specific checkmate pattern at a time. Spend an entire session on back rank mates. Then spend a session on smothered mates. Focused repetition builds recognition faster than variety ever will.
Here is a practical 15-minute daily routine that works for adult learners:
Minutes 1-5: Warm-up with one pattern. Set your puzzle trainer to a specific pattern type (most platforms allow filtering). Solve 10-15 positions featuring just that one checkmate pattern. This builds raw recognition speed.
Minutes 6-10: Mix two patterns together. Now add a second pattern and solve puzzles where the solution is one of the two. This trains your brain to distinguish between patterns and choose the right one in context.
Minutes 11-15: Play out a position against a computer. Set up a position where one of the checkmate patterns is possible but requires several preparatory moves. Play against a computer at moderate strength. This bridges the gap between puzzle solving and real-game application.
The key insight for adult learners is that your brain needs more repetitions to build automatic recognition compared to a child learning the same patterns. Research on adult neuroplasticity shows that spaced repetition over weeks is far more effective than cramming. Spread your practice across 8 to 12 weeks rather than trying to learn everything in a weekend.
Another common mistake I see: players only practice patterns when they are the attacking side. You also need to practice defending against these patterns. Set up positions where your opponent is threatening a back rank mate and practice finding the defensive resource. This dual approach (attacking and defending) gives you a much richer understanding of each pattern.
Finally, review your own games with checkmate patterns in mind. After each game you play, scan the final position and ask: “Did any of the 10 patterns appear? Was there a moment where I could have delivered a known checkmate pattern but missed it?” This self-review process connects your practice to your actual play and accelerates improvement.
Many adult learners tell me they practice puzzles for hours but still miss mates in games. The disconnect usually comes from practicing puzzles at too shallow a level. When you solve a puzzle, take an extra 30 seconds after finding the answer to study the position. Ask yourself: what made this pattern possible? What features of the position should I look for in future games? This reflection turns a puzzle from a one-time exercise into a permanent addition to your pattern library.
Memory Techniques for Checkmate Patterns
Adult learners often ask me why they can study checkmate patterns for hours and then forget them a week later. The answer is not a memory problem — it is a technique problem. Children absorb patterns through sheer volume of play. Adults need a more structured approach to encoding these patterns into long-term memory.
The first technique I recommend is chunking. Instead of trying to memorize 10 separate patterns, group them into categories. Here is one way to chunk them: the rook patterns (back rank mate, epaulette mate), the knight patterns (smothered mate, Arabian mate), the rook-and-knight patterns (Anastasia’s mate, Arabian mate), the bishop patterns (Boden’s mate, Anderssen’s mate, Morphy’s mate), and the beginner patterns (Scholar’s mate, Fool’s mate). Now you are remembering five groups instead of 10 individual items, and your brain handles that much more easily.
The second technique is naming with vivid associations. The names of checkmate patterns are not just historical trivia — they are memory anchors. When you think “smothered mate,” you should visualize a king literally being smothered by its own pieces. When you think “epaulette mate,” picture those rooks as gold shoulder decorations on a military uniform. The more vivid and visual the association, the stronger the memory.
The third technique is visualization without a board. Close your eyes and mentally set up the position for each pattern. Place the king, the key attacking pieces, and the blocking pieces. Then mentally “play” the checkmate. Doing this for each of the 10 patterns takes about 5 minutes, and it dramatically strengthens your ability to recall the pattern during a game. This works because mental visualization activates the same neural pathways as actually seeing the position on a board.
The fourth technique is the personal pattern library. Keep a notebook or digital document where you record every time you encounter one of these 10 checkmate patterns in your own games. Write down the position, the move sequence, and whether you spotted it or missed it. Over time, this becomes a personalized reference that connects the abstract patterns to your concrete experience. Your brain remembers stories and personal experiences far better than abstract diagrams.
One more piece of advice: do not try to learn all 10 patterns at once. Start with the top three (back rank mate, smothered mate, and Anastasia’s mate). Master those over two weeks. Then add two more. Gradual accumulation beats frantic cramming every time, especially for adult learners.
The spaced repetition schedule I recommend looks like this: study a pattern on Day 1, review it on Day 3, review again on Day 7, and then again on Day 14. By the end of two weeks, the pattern will have moved from short-term memory into long-term retention. You can use flashcard apps or simply set calendar reminders for your review sessions.
Frequently Asked Questions About Checkmate Patterns
What is the most common checkmate pattern?
The back rank mate is the most common checkmate pattern in practical play, especially at the club and intermediate level. It occurs when a castled king is trapped behind its own pawn shield on the back rank, and a rook or queen delivers check on that rank. This pattern accounts for roughly 25 percent of all checkmates in games rated between 800 and 1800.
What is the hardest checkmate pattern?
The smothered mate is often considered the hardest checkmate pattern to spot in a real game because it typically requires a queen sacrifice to set up the final knight checkmate. The Boden’s mate with two bishops on criss-crossing diagonals is also difficult to recognize because it requires seeing how two pieces cooperate from different angles simultaneously.
How do I get better at seeing checkmate patterns in games?
The most effective approach is focused puzzle practice on specific patterns, combined with visualization exercises. Solve 10 to 15 puzzles per day for one pattern type, then mix patterns together. Review your own games specifically looking for missed checkmate patterns. Adult learners benefit most from spaced repetition over 8 to 12 weeks rather than intensive short-term study.
Can you checkmate in 10 moves?
Yes, checkmate is absolutely possible within 10 moves. The fastest is Fool’s mate in 2 moves, and Scholar’s mate occurs in 4 moves. Many of the checkmate patterns in this guide can be executed within 5 to 10 moves once the setup position is reached. The key is recognizing the pattern early so you can steer the game toward it.
How many checkmate patterns are there in total?
There are over 30 named checkmate patterns in chess theory, with some references listing as many as 36 or 37 distinct patterns. However, most of these are rare or variations of more common patterns. The 10 patterns covered in this guide represent the most frequently occurring ones that adult improvers will encounter in practical play.
Should I memorize checkmate patterns or learn through practice?
Both. Memorization gives you the pattern template, and practice teaches you to recognize it in varied positions. Adult learners should start by studying the pattern positions until they can recreate them from memory, then immediately transition to solving puzzles featuring those patterns. The combination of memorization and application is far more effective than either approach alone.
Start Converting More Games with These Checkmate Patterns
The 10 checkmate patterns every adult improver should memorize are not just theoretical curiosities. They are the practical tools that separate players who consistently convert their advantages from players who fumble winning positions. The back rank mate alone will win you dozens of games once you start looking for it in every position.
My advice: start with the top three patterns (back rank mate, smothered mate, and Anastasia’s mate). Practice them for two weeks using the daily routine I described. Then layer in the remaining patterns one or two at a time. Within two months, checkmate pattern recognition will become second nature, and you will finish games with the kind of precision you have been aiming for.
Every strong player you admire went through this exact process. They did not start with brilliant intuition. They built their pattern recognition one checkmate at a time, and so can you. Pick a pattern, open a puzzle set, and start training. Your future self — the one converting every winning position into a win — will thank you.