
Yes, you can do hydro dipping yourself, and you can do it in an afternoon once you have a kit. A hydro dipping kit bundles the consumables you need to float a printed pattern on still water and push a part through it, so the design stretches and wraps around every contour before the carrier dissolves. The core of any kit is a hydrographic film, an activating solution, a primer or base coat, and a clear coat to seal the result, with prep tools and a respirator often thrown in.
That last point is where most first-time buyers get caught. Film is frequently sold apart from the kit, so an apparently complete box can leave you halfway through a project with nothing to print. We checked exactly what is in each of the seven kits below, what is missing, and how the ratings and review counts hold up. This roundup covers the best hydro dipping kits for 2026, with each pick rated on kit completeness, film size, and whether the activator is strong enough for the substrate you have in mind.
We have used these kits on PC cases, keyboards, tumblers, small firearm components and 3D printed parts, and the honest summary is that first dips usually fail. The difference between a good kit and a frustrating one is not really the film pattern. It is whether the box contains a primer that matches the part, an activator that is matched to that primer, and enough clear coat to actually seal the transfer. Get that trio right and the rest is practice.
One more thing before we start. Hydro dipping is a water-based immersion process, not a coating that protects bare metal on its own. If you are finishing automotive trim, a heat-exposed part, or anything that lives outdoors, the clear coat is doing the durability work, and you should expect to maintain it. If your goal is a hard-wearing protective finish rather than a pattern, powder coat or cerakote is a better tool for the job.
Top 3 Picks for Hydro Dipping in 2026
These three cover the most common situations: the kit with the fullest box, the best-rated film and activator pairing among the listings with real review counts, and the kit with the most customer feedback behind it.

MyDipKit CF-152-BLUE Carbon Fiber Kit
- Full consumable set including primer and clear coat
- Carbon fiber film with vibriant blue base paint
- Includes prep pad and respirator

Dip Demon Woods In Winter Combo Kit
- Best rated among kits with double-digit reviews
- Snow camo film with 16 oz aerosol activator
- 20 inch wide by 6.5 ft film sheet

MyDipKit Black Dead Hedz Skulls
- Most customer feedback of any kit here
- Film activator sealant and instructions in one box
- Skull pattern suits cosplay and props
All 7 Hydro Dipping Kits at a Glance in 2026
Every kit below includes hydrographic film. The differences are what comes alongside it, how large the film sheet is, and whether you need to buy a base coat and a clear coat separately before you can start.
| Product | Specifications | Action |
|---|---|---|
| MyDipKit CF-152-BLUE Carbon Fiber Entry Level Kit |
|
Check Latest Price |
| Dip Demon Woods In Winter Snow Camo Combo Kit |
|
Check Latest Price |
| MyDipKit Black Dead Hedz Skulls LL-801 |
|
Check Latest Price |
 MyDipKit Hydrographics Film Kit LL-739 American Flag MyDipKit Hydrographics Film Kit LL-739 American Flag |
|
Check Latest Price |
 Afterlife Industries Carbon Fiber 15 and Hydrovator Combo Afterlife Industries Carbon Fiber 15 and Hydrovator Combo |
|
Check Latest Price |
 Dip Demon Reaper Skulls Combo Kit Dip Demon Reaper Skulls Combo Kit |
|
Check Latest Price |
 Dip Demon Garrison Glory Flags Combo Kit Dip Demon Garrison Glory Flags Combo Kit |
|
Check Latest Price |
1. MyDipKit CF-152-BLUE Carbon Fiber Entry Level Kit – the all-in-one box
Hydrographics Dip Kit Store – DipKitStore – Water Transfer Printing – CF-152-BLUE – Black & Clear Carbon Fiber with Vibriant Blue Base Paint … (Entry Level)
Water-based paint
20 inch by 6.6 ft carbon fiber film
Activator clear coat and prep pad included
Pros
- Everything except the dipping container and hot water is in the box
- Film is 20 inch wide by 6.6 ft so it suits larger parts
- Carbon fiber pattern with vibriant blue base paint reads well on curved surfaces
- Prep pad and respirator included for a safer first session
Cons
- Entry level paint and clear coat volumes are small
- Carbon fiber pattern is a single look with no pattern options
This is the kit we hand to anyone who says they have never dipped anything before. The box lists seven pieces: film, aerosol primer, paint, activator, clear coat, a prep kit with prep pad and respirator, and step-by-step instructions. The only things it does not include are the dipping container itself and hot water, which is exactly the right split because the tub is the one purchase that depends entirely on the size of what you want to dip.
The carbon fiber pattern with vibriant blue base paint is a genuinely good first project choice. Carbon weave has fine repeating detail rather than large blocks of colour, so small mistakes in dwell time and angle still produce a part that looks intentional. If your first attempt is slightly uneven, the weave hides it. A large camo or flag pattern does not.
Buyers rate this one at 4.4 out of 5 across 22 reviews, and the recurring comment is completeness. People highlight that the process is the original patented DIY version of the commercial one, and that the film is described as the highest quality in the box rather than an afterthought. Several reviews mention that technical support is available by email and phone, which matters more than it sounds when your first float fails.
What you should know before you buy
The paint type is water-based, and the primer is an aerosol can. Aerosol is genuinely convenient for small parts because you do not need to rent a spray gun, but coverage on a large flat panel will be thin, and you should expect to lay down two or three coats rather than one. The kit is sold as entry level, so if you plan on a PC side panel rather than a mouse shell, buy the aerosol cans and plan to buy a second clear coat can before you start.
Who this suits and who should skip it
It suits first-timers, PC and gaming hardware projects, and anyone who wants one box that answers the beginner question of what do I actually need. Skip it if you already own primer, base coat, activator and clear and only need film, because in that case you are paying for four cans you will never open. It is also the wrong pick if you are set on a specific pattern other than carbon fiber, because the film is fixed to this kit.
2. Dip Demon Woods in Winter Snow Camo Combo Kit – the best rated where reviews are plentiful
Hydrographic Film Combo Kit Woods in Winter White Snow Camo Hydrographic Water Transfer Film Activator Combo Kit Hydro Dipping Dip Demon
16 oz aerosol activator
Winter snow camo film
20 inch wide by 6.5 ft sheet
Pros
- Best rating among the kits with double-digit review counts
- Generous 16 oz activator can covers many dips
- Large 20 inch by 6.5 ft film sheet
- Film is described as premium grade
Cons
- Film and activator only with no primer base coat or clear
- White camo needs a dark base coat to read properly
Two things make this the strongest-rated kit with a real sample size. The first is the activator volume. You get a 16 oz aerosol can rather than a small squeeze bottle, and activator is the consumable that runs out first, because you spray it across the float and lose a lot of overspray every dip. The second is the film sheet size at 20 inch wide by 6.5 ft long, which is generous enough to cover a decent portion of a larger part in one layout.
At 4.6 out of 5 across 11 reviews, it holds the highest average of any kit here with a double-digit review count, and the feedback centres on pattern quality rather than on the hardware. One verified purchaser reported successfully dipping a Euro mount, which is a nice reminder that these kits are not restricted to small decorative parts. Snow camo is a forgiving pattern for beginners because the white areas are hard to make look wrong.
Where the pattern choice matters
Winter snow camo is a light pattern, and light patterns need a dark base coat. The manufacturer pairs this film with a white or grey base elsewhere in the range, but if you are working with the darker tones in this camo you will want a dark base to get contrast. Getting the base coat right is the single biggest reason snow camo transfers look muddy, and it is a fixable prep issue rather than a film problem.
Who should buy this and who should not
Buy it if you already have primer, base coat and clear coat on the shelf, or if you are willing to add a base coat and a clear coat to the box yourself. It pairs naturally with outdoor and hunting-themed parts, and the large sheet suits a helmet or a set of panels. Skip it if you want a single-box first project, because film and activator alone is not a complete kit, and no amount of careful technique will make an unsealed part last outdoors.
3. MyDipKit Black Dead Hedz Skulls LL-801 – the most reviewed
MyDipKit Black Dead Hedz Skulls – Hydrographics Film Kit LL-801 – Water Transfer Printing
Hydrographics film kit
Entry level box
Black skull pattern
Pros
- Most customer reviews of any kit in this group
- Film activator and protective sealant in one box
- Waterproof finish is claimed for dipped items
- Instructions included for first-time buyers
Cons
- Listed as a hobby kit aimed at kids and teens so component sizes are modest
- No primer or base coat listed in the box
- Black skull is the only pattern in the box
This is the one with the most customer feedback behind it, 40 reviews at 4.3 out of 5, and that matters more than the headline rating in a niche hobby. With only 11 or fewer reviews on most of the other kits here, a larger sample is a better signal of what actually happens when someone opens the box and follows the instructions.
The listed contents are hydrographics film, activator, protective sealant, and instructions, with a dipping tank noted as optional. The black skull pattern is the draw, and it is a good one for cosplay props, trophy pieces, and hobby craft work. The material is listed as PVC and the finish is described as waterproof, which we would read as water-resistant rather than a full exterior clear coat.
Reviewers consistently describe the kit as comprehensive and easy to follow, and the pattern as the reason they bought it. The listing also frames it as a family activity suitable for kids and teens, which is a fair warning about the scale of the components if you were planning a large automotive panel.
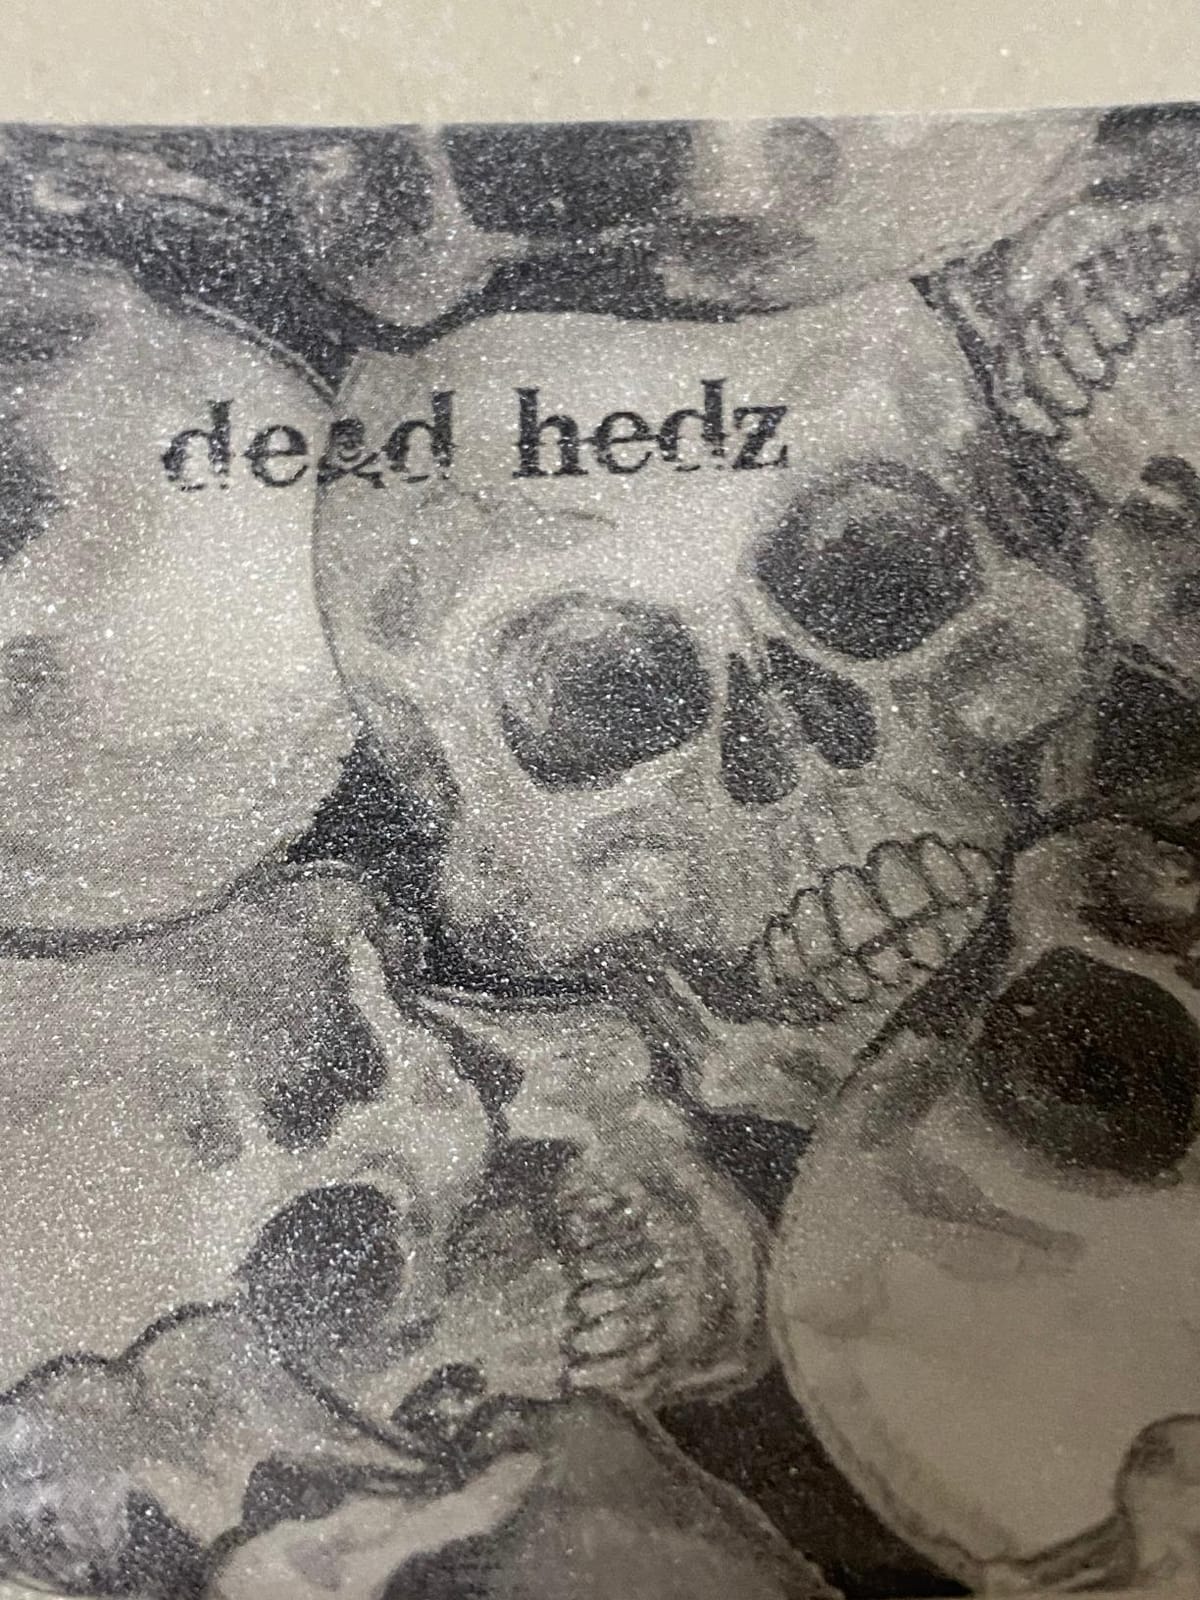
What to watch is the prep gap. Because the listed contents do not include a primer or a base coat, a first dipper following the instructions literally will be activating film onto bare plastic. Most first-time failures we have seen trace back to exactly this, and the fix is a single all-surface primer coat before you ever get near the water.
Best first project for this kit
This is the kit we would hand to a beginner working on a small plastic shell, a tumbler body, or a printed part. Small parts are forgiving because you can control the entry angle easily, and they let you waste a cheap practice piece instead of a project piece. If you have never done this before and you are picking between kits purely on which one seems most approachable, the instruction sheet being included matters more than most buyers assume.
Where the value sits and where it does not
The value here is pattern plus activator plus sealant in a single inexpensive box, and it is a low-cost way to try hydro dipping without committing to a full professional set. It is not the right kit for heat-exposed substrates, for a part that needs to survive sun and weather, or for a finish that has to look automotive-grade. For those jobs, spend the extra money on a kit that includes primer and a proper clear coat, because that is where the durability comes from.
4. MyDipKit Hydrographics Film Kit LL-739 American Flag – the full consumable set
MyDipKit Hydrographics Film Kit LL-739 – Respect American Flag -Water Transfer Printing
Activator primer gloves and respirator
Pre-mixed aerosol base coat
Clear coat and film included
Pros
- Longest documented component list of any kit here
- Includes gloves scuff pad and a respirator in the box
- Pre-mixed aerosol base coat removes guesswork
- Film sized 20 inch wide by 6.6 ft
Cons
- One reviewer reported a wasted-time experience with this kit
- Flag pattern is not a general purpose finish
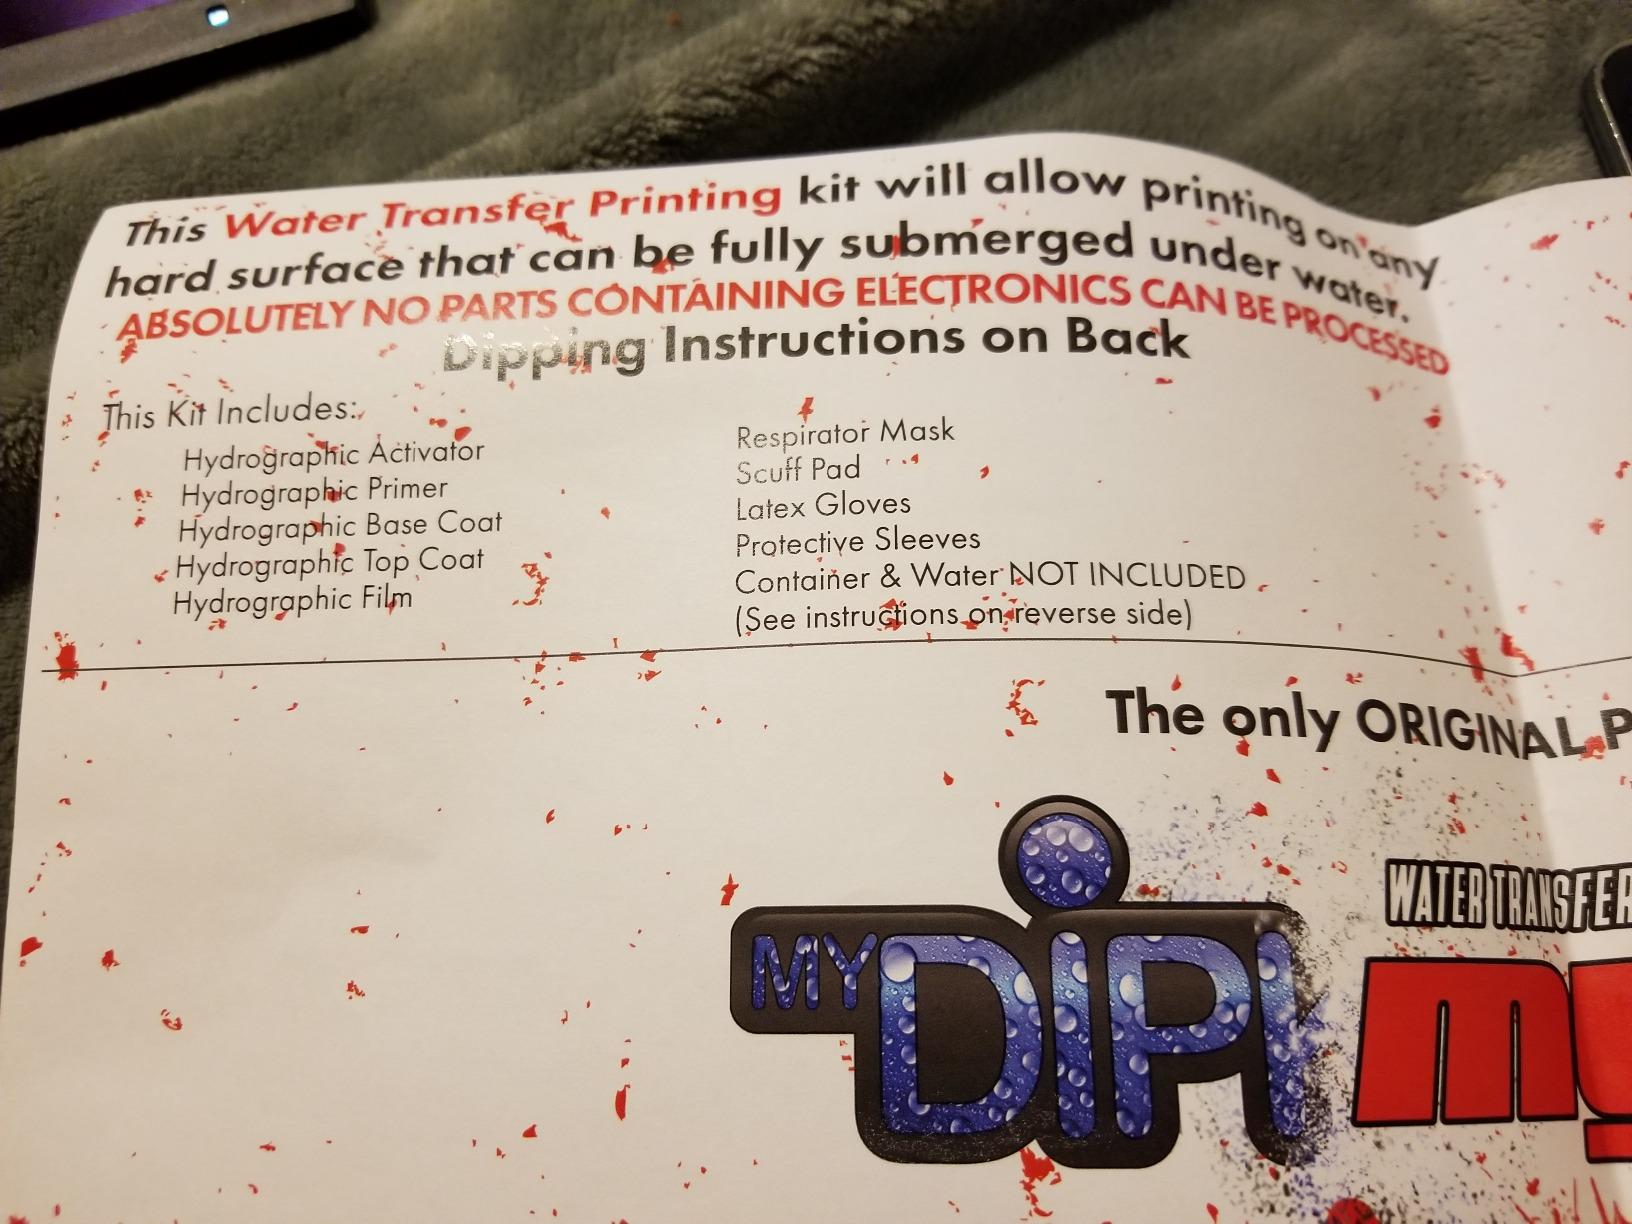
The LL-739 lists more components than anything else in this roundup: activator, primer, gloves, scuff pad, respirator, a pre-mixed aerosol base coat, high quality clear coat, and the film. That completeness is the reason to buy it, and it is the closest thing here to a one-box answer for a buyer who has never dipped before and does not want to assemble a shopping list of their own.
At 4.4 out of 5 across 15 reviews, the feedback is positive overall. Buyers mention that the instructions come from experienced processors and that the kit is direct from the original manufacturer, and one reviewer customized engine cases with it. There is also a single negative review citing wasted time, which is worth taking seriously: with any first-dip kit, the failure rate on attempt one is the main reason a purchase gets wasted.
Read the base coat before you buy
The pre-mixed aerosol base coat is the quiet advantage here. Mixing your own base colour to a film is the most common cause of a muddy transfer, and a pre-mixed can removes one variable on your first attempt. The trade-off is flexibility. If you plan to dip multiple parts in different colours, you will run out of the supplied base and need to buy more, and you will be matching the rest yourself.
Who this kit fits
It fits flag-themed projects, patriotic display pieces, and anyone who wants the full prep chain in one purchase. It is also the safest of these kits for a first session because the safety gear and the prep layers are all in the box. Skip it if your project is a non-flag part and you would rather buy a different film pattern, since the pattern is fixed to the kit and cannot be swapped.
5. Afterlife Industries Carbon Fiber 15 and Hydrovator Combo – the pairing to try
Hydrographic Film & Activator Carbon Fiber 15, 16 oz Hydrovator. Hydro Dipping, Water Transfer Film, Hydrographic Dipping, Hydrographic Activator, Hydrographics, Water Transfer Printing
6.5 feet of carbon fiber film
16 oz Hydrovator activator
Carbon fiber 15 pattern
Pros
- Film and 16 oz activator pairing with no separate primer purchase needed
- Activator is a full 16 oz can
- Carbon fiber weave is the most versatile pattern in this roundup
Cons
- Only 3 reviews so the rating is not meaningful yet
- Film and activator only with no primer base coat or clear coat
This is the newest listing in the group and the smallest in terms of feedback, and we want to be straight about that. It carries a perfect 5.0 rating, but that rating comes from three reviews, so treat it as a promise rather than a track record. We include it because the pairing itself is sound, not because the rating proves anything.
What you get is 6.5 feet of carbon fiber film and a 16 oz can of Hydrovator activator. The activator volume is the real story here, because it matches the generosity of the better combo kits while the film alone is among the most affordable. If you already have primer, base coat and clear coat from any previous project, this pairing costs less than any complete kit in the group while still including a full 16 oz activator can, and the carbon fiber 15 pattern is the workhorse pattern for PC cases, keyboard plates and trim panels.
One of the listed cons is honest: with three reviews there is no consensus on how the film behaves over time. Carbon fiber prints are thin-ink prints by nature, so the density of the weave depends heavily on your base coat and your clear coat thickness, and we would not rely on a three-review sample to plan a large panel.
Best use for this combo
Carbon fiber on PC cases, keyboard plates, and gaming mouse shells is where this combination earns its keep. The pattern is forgiving, the scale is small enough that 6.5 feet of film covers a lot of surface area, and the parts are flat enough that entry angle is easy to control. It is also a sensible way to test a pattern before committing a whole kit to it, since the film cost is the smallest part of a real project anyway.
What you need to add before you start
You need an all-surface primer, a base coat, and a clear coat, and those three purchases are effectively the rest of the kit. Buy the base coat in a dark grey or black for the deepest carbon look, and buy more clear coat than you think you need, because two thin coats beat one thick coat when the finish has to survive handling. Once those are on the shelf, this combo does the actual pattern work very competently.
6. Dip Demon Reaper Skulls Combo Kit – pattern variety
Reaper Skulls Hydrographic Water Transfer Film Activator Combo Kit Hydro Dipping Dip Demon
Reaper skull film pattern
16 oz aerosol activator
20 inch by 6.5 ft sheet
Pros
- Reaper skull pattern is distinct from generic skull kits
- Same generous 16 oz activator can as the other Dip Demon combos
- Large film sheet at 20 inch by 6.5 ft
Cons
- Only 7 reviews and a low sales rank limit the evidence
- Film and activator only with no prep chemicals or clear coat
The reaper skull pattern is the reason to look at this one. Generic skull kits are easy to find, and a reaper skull is a more distinctive graphic that reads well on cosplay armour, mask props, and display pieces. The film and activator pairing is the same 16 oz can and large sheet format as the other Dip Demon combos, so the sizing maths is already familiar if you have used one of them.
The rating is 4.3 out of 5 from seven reviews, and a listed sales rank well outside the top ranks of its category. We are not going to dress that up. Seven reviews and a low sales rank tell you this is a small, lightly reviewed listing rather than a proven performer, and we would treat it as a pattern purchase with an activator bonus rather than a complete solution.
Matching the base coat to a skull print
Skull prints are high contrast, which means the base coat does more work than usual. A light base under a white skull blows out the detail, while a mid-tone base gives the pattern room to read. If you already have a mid-grey base coat from another project, this kit drops straight into your workflow. If you do not, factor in a base coat can before ordering.
Who should order it
Order it if the reaper pattern is the specific look you are after and you are comfortable sourcing primer, base coat and clear separately. Skip it if you want a beginner-ready box with a full prep chain, or if the part you are dipping runs hot. Skull props and cosplay pieces rarely see sustained heat, so this is a better match for that work than it is for automotive trim or anything left in direct sun.
7. Dip Demon Garrison Glory Flags Combo Kit – the flag sheet with caveats
Hydrographic Film Combo Kit Garrison Glory Flags America USA Transparent Black and Clear Hydrographic Water Transfer Film Activator Combo Kit Hydro Dipping Dip Demon
Flag pattern film
16 oz aerosol activator
20 inch by 6.6 ft sheet
Pros
- Film sheet is 1 square meter of usable area
- Activator and detailed instructions included
- Film is labelled for ease of use
Cons
- Lowest rated kit here at 3.6 out of 5
- Base coat is not included and must be bought separately
- Transparent areas show the base coat so prep quality shows through
This one is listed last because it carries the lowest rating in the group, 3.6 out of 5 from seven reviews, with a share of one-star feedback. That is not disqualifying on its own for a film and activator combo, but you should know it going in rather than discovering it later. The upside is genuine: you get a full square meter of film, a 16 oz activator can, and detailed instructions.
The important caveat is the finish itself. The film is a transparent black and clear flag graphic, which means the base coat is doing visible work wherever the film is clear. A white or grey base coat is recommended, and any imperfection in that base coat will show straight through. On a glossy pattern that would be hidden, on this one it is the finish.
On the positive side, the instructions are described as professional grade, the film is labelled for ease of use, and the sheet is a genuinely useful size. For a project where you want to lay out several large parts at once, having a full square meter of film on hand is worth planning around.
Prep quality decides the result here more than the film does
On a transparent-over-colour pattern, the base coat is not a background, it is the visible layer. Sand it properly, lay even coats, and let each one fully flash off before the next, because any orange peel or blotching reads straight through a clear film. Budget more prep time on this kit than on an opaque pattern, and the result will justify it.
Who should still consider it
Consider it if you are doing a large flag-themed project, you have a good spray setup for the base coat, and you are confident enough to do careful prep. Skip it if you are a first-time dipper, because the low rating and the transparent finish together make it an unforgiving place to learn. For a first project, any of the opaque kits above will teach you the same process with a much softer failure mode.
What Comes in a Hydro Dipping Kit
This is the question that comes up most often from people starting out, and it is worth answering directly. The equipment list for hydro dipping breaks into eight components, and a complete kit contains all eight:
Hydrographic film – the printed pattern on a water-soluble carrier, sold as a sheet or roll.
Activator – a PVA-based solution, usually in an aerosol can, that dissolves the carrier and releases the ink.
Primer – usually an all-surface aerosol or etching primer to give the part something to bond to.
Base coat – a colour coat that the pattern sits on top of, and the layer the pattern reads against.
Clear coat – the seal that protects the finished transfer from water, handling and UV.
Scuff pad or prep pad – for cleaning and lightly abrading the part before primer.
Prep-wipe or degreaser – to remove oils and contaminants that cause film lifting.
Gloves and instructions – plus a respirator on the better kits, since activator and clear coat are aerosol products.
Not on that list is the dip tank. A container of still water is the one piece most kits deliberately leave out, because the right size depends entirely on the part. A tall narrow tub works for gun components and tumblers. A wide shallow tub works for panels, PC cases and anything you want to lay out on a flat film sheet. Many first-time buyers also miss that the film is frequently sold separately from the chemicals, which is why we checked the contents of every kit in this roundup rather than assuming.
For the technique side of things, our guide to the best scrapbooking kits for beginners covers the same learning curve most people hit with any kit-based craft: learn the process on something cheap before you touch the part you care about.
How to Choose a Hydro Dipping Kit: 6 Criteria That Matter
Film pattern is the least important decision you will make. These six criteria actually determine whether your first project succeeds.
1. Does the box include primer, base coat and clear coat?
A kit that includes all three is a complete project kit. A film-plus-activator combo is a refill, and it works beautifully if your shelf is already stocked, but it will not start a beginner. This is the single clearest dividing line between the kits in our list. The CF-152-BLUE and LL-739 kits include the full prep chain. The Dip Demon combos and the Hydrovator pairing do not, and the LL-801 lists film, activator, sealant and instructions only.
On the question of whether you need primer and a base coat, or just one layer: use both. The primer is the bonding layer and the base coat is the colour layer. This comes up repeatedly as an argument in dipping communities, and the confusion is understandable because many videos show a single coat. A single layer works for a quick prop. It is the most common reason a pattern lifts or turns muddy on a part that matters.
2. Is the film the size you need?
Film comes as a sheet or roll, and the sizes in this roundup cluster around 20 inch wide by 6.5 or 6.6 ft long, which is roughly a square meter. That is enough for several small parts or one good-sized panel. If your part is a full-size door or a long bumper section, you will want more film than a single sheet gives you, and you should plan the layout before you activate anything, because activated film has a short working window and cannot be saved.
A related question we see constantly is how much film a part needs. The honest answer is that you plan the sheet to fit the part with overlap, and you accept that some sheet gets used on practice. Learning to estimate a layout is a skill that comes from the first two or three dips, not from arithmetic.
3. What activator is in the can, and what is it matched to?
Activator is the most confusing consumable in this process, and it is the one that most directly causes failure. It dissolves the film’s carrier so the ink can float free and stretch. Too little and the film stays stiff and will not wrap. Too much and the ink disperses into a muddy cloud. Activator also needs to be matched to the primer and base coat system, which is why a kit from one manufacturer works more predictably than a random mix of brands.
Can you use a substitute? In a pinch, people report success with plain PVA-type solutions, and a well-known community activator is often recommended because it does not require a primed part and tolerates the heat firearms generate. But a substitute is not an equal swap. For a first project, use the activator that came with the kit, get a clean float, and only experiment once you understand how long your own activator takes to work.
4. Is the film quality described honestly?
Film quality shows up in ink density and how forgiving the pattern is. Pattern-heavy prints with fine detail and bold blocks behave differently from simple camouflage. The most useful signal in a listing is whether the film width and length are stated, and whether the base coat is specified. Kits that name a recommended base coat, like the flag sheet that calls for white or grey, are selling from real process experience rather than catalog copy.
5. Is the clear coat enough to do the job?
The clear coat is the durability layer. A single thin coat leaves the transfer vulnerable to handling and water, and a pattern on a part that lives outdoors will fade faster than most buyers expect. Lacquer, urethane and 2K clear all work, and the difference that matters most is that the coats must not be applied too soon after the dip, because the carrier and any residual activator still need to fully flash off. Sealing too early is a leading cause of a finish that later peels.
For waterslide-style transfers and decals, the same rule applies. Fix a lifting decal rather than stripping it off, re-wetting with a cotton swab and reapplying the setter works better than starting again, and the final seal is what decides how long the piece looks good.
6. Can your substrate handle the process?
Most hard surfaces dip fine: metal, plastic, glass, and sealed wood. The exceptions matter. PLA and other 3D printed plastics are heat-sensitive, and a part that warms up during handling can distort after the transfer, so print with a higher infill and cool the part fully first. Firearm components generate their own heat, which is the single biggest reason heat-tolerant activator exists as a category. Automotive interior trim is usually plastic and dips well, but exterior panels see UV and heat that will shorten the life of any clear coat you apply.
If you are weighing hydro dipping against other finishes: powder coat is the most durable and gives you colour but no pattern. Cerakote is a thin ceramic coating with excellent abrasion and heat resistance, and it is a better answer for a firearm or a tool that needs protection rather than decoration. Vinyl wrap gives you a crisp flat pattern and excellent UV resistance, but it is very difficult on complex 3D contours. Hydro dipping wins on complex shapes and loses on long-term outdoor durability.
The clear coat question in a single line: a quality 2K clear applied in two or three thin coats, given enough time to cure between the dip and the first coat, will outlast anything applied straight off the water.
How to Hydro Dip: 8 Steps From Prep to Sealed Part
None of the kits in this roundup includes a walkthrough that assumes you already know the process, so here is the sequence that works. It takes about as long as the flash-off times suggest, which is why you should not plan to do five parts in an evening.
1. Degrease the part. Wipe it with the prep-wipe and let it dry completely. Any oils remaining on the surface are the single most common reason a film refuses to stay on.
2. Scuff lightly. Work the scuff pad over the whole surface, not just the visible areas, because film wraps onto edges and inside corners too. Light scuffing gives the primer something to bite on.
3. Prime. Apply the all-surface primer in thin coats and let each one flash off before the next. A single thick coat runs and pools in low spots, and those runs show as lines in the transfer.
4. Base coat. Lay down your colour coat. The pattern reads against this layer, so the base coat choice is a design decision, not just preparation. Contrast gives a bolder transfer; a close match gives a subtle one.
5. Fill the tub and let it settle. Use a container larger than the part in every direction, fill it with water, and wait until the surface is completely still. Any current or dust on the surface will drag the film apart.
6. Lay and activate the film. Place the printed film on the water, ink side up, and spray activator across it from about 30 centimetres away. Watch the ink release. Work your way from one end of the sheet to the other and keep the can moving.
7. Dip the part. Push the part through the film at a shallow angle, in one continuous motion, without pausing or lifting. A slow entry folds the pattern and stretches it unevenly. The part should be fully submerged and then brought back out smoothly.
8. Dry, then seal. Hang the part to flash off fully before any clear coat goes near it. Then apply two or three thin coats of clear, giving each coat the time your product specifies. Rushing this step is the most common route to a finish that peels later.
There is a ninth step nobody mentions, and it is the one that decides whether you keep doing this. Dip something cheap first. A plastic shell or a scrap bracket teaches you timing far better than a part you care about, and the film is the least expensive part of the whole project anyway.
Hydro Dipping Troubleshooting: 5 Failure Modes
Almost every failed dip comes down to one of five things you can see. Here is what each one looks like, what causes it, and what to change.
Film lifts off the part as it goes in
The likely cause is oils, dust or a contaminated surface, or no primer layer. Degrease with the prep-wipe, scuff lightly, and apply an all-surface primer before the base coat.
Pattern goes muddy or the colours merge
The likely cause is over-activated film, or a base coat colour too close to the pattern. Use less activator, and move to a contrasting base coat.
Air bubbles in the finish
The likely cause is a part dipped with a wet surface, or pulled out too slowly. Dry the part fully, then pull it through in one smooth stroke without pausing.
Film tears or the float falls apart
The likely cause is activating too early, or the film was disturbed before the part entered. Activate immediately before dipping and keep the water surface still and draft-free.
Transfer peels later or goes dull fast
The likely cause is clear coat applied too soon, or too few coats. Let the part flash off fully, then apply two or three thin coats of a quality clear.
One last piece of process advice that saves more film than any other tip. Lay the film, activate it, and put the part in the water immediately, with everything staged within arm’s reach before you start. Our beginner kit guide covers the same staging principle for a different craft, and it applies identically here.
Frequently Asked Questions
What equipment do you need for hydro dipping?
You need eight things: hydrographic film, activator, primer, base coat, clear coat, a scuff pad, a prep-wipe or degreaser, and gloves with a respirator. You also need a container of still water sized to your part and a way to heat it, plus somewhere to hang the dipped piece. That is the complete list, and any kit claiming otherwise is missing something.
Can you do hydro dipping yourself?
Yes. The whole process is a float, a spray, and a dip, and most people get a usable part within a few attempts. The learning curve is in the prep layer and the timing between activating the film and entering the part, not in any complicated equipment. Practise on a cheap plastic shell before you touch a project piece.
What kind of film is used for hydro dipping?
Hydrographic film is a printed pattern suspended in a water-soluble PVA carrier. It floats flat on still water, the activator dissolves the carrier, and the ink releases to be stretched over the object as it is dipped. The usual materials are printed ink on a PVA base, supplied as a sheet or roll roughly 20 inches wide.
What can I use as an activator for hydro dipping?
Activator is a PVA-based solution, usually sold in an aerosol can, and it is matched to the primer and base coat system in a given kit. Substitution is possible and community formulas exist, including heat-tolerant versions for substrates that generate their own warmth, but a substitute changes your timing. For a first project use the activator supplied with the kit.
Can you use regular spray paint for hydro dipping?
You can, but a dedicated base coat gives you a far more predictable result. Regular spray paint can outgas or adhere differently, and any of that shows up as a lifting or muddy transfer. If you do use it, apply several thin coats with full flash-off between them, and treat the clear coat step as non-negotiable.
Which is better, cerakote or hydro dip?
They solve different problems. Cerakote is a thin ceramic coating chosen for abrasion and heat resistance on firearms, tools and parts that need protection, and it gives you colour but no pattern. Hydro dipping gives a multi-colour pattern that wraps complex 3D shapes, but durability comes from the clear coat and it needs maintenance outdoors. Protection needs a coating. A pattern needs a dip.
Conclusion
For a first project, take the MyDipKit CF-152-BLUE carbon fiber kit. It is the only pick here with the full chain in one box, including primer, base paint, activator, clear coat, prep pad and respirator, and carbon fiber is the most forgiving pattern to learn on. You will still need a tub, but everything else is accounted for.
If your shelf is already stocked, the Afterlife Industries carbon fiber and Hydrovator combo is the most economical pairing to keep dipping with, and the Dip Demon snow camo kit carries the strongest rating in this group thanks to its generous activator can. If the reaper skull or flag patterns are the look you are after, those kits are fine, but add a base coat and a clear coat before you start. As always for kit-based crafts, our beginner kit roundup makes the same point in a different field: buy the complete set, practise on something cheap, and let the first attempt be practice. That is how you get to the best hydro dipping kits and actually finish a part in 2026.